Benefits of the Use of Ultrasound in Physical Therapy

If you have ever thought of using ultrasound for physical therapy, take a look at this article by Erica Jacques for more information. Give us a call at 619-756-7500 if you have any additional questions!

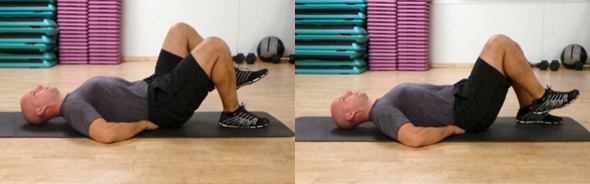
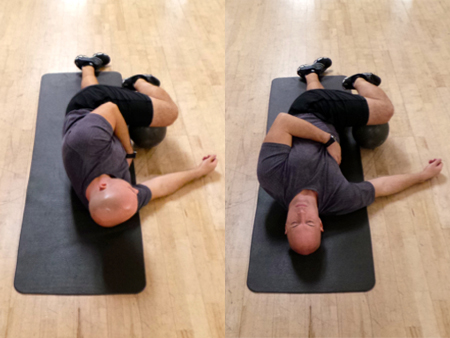
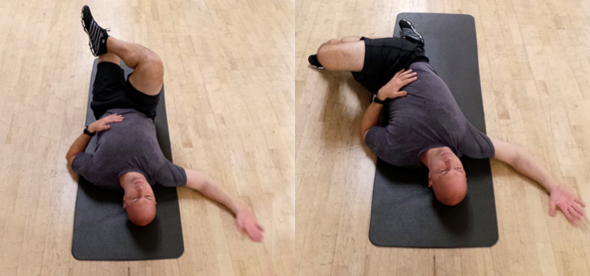
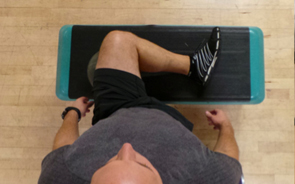
Ultrasound can help to prepare a muscle for stretching.
Ultrasound, according to Alain-Yvan Belanger, is the most commonly used modality in physical therapy today. Its use dates all the way back to the 1880s. Ultrasound machines generate sound waves that are higher than the frequency we can hear. The effect of these sound waves on the body’s tissues produces a number of benefits.

Deeper Heat
According to Belanger, the way ultrasound generates heat is through the vibrations caused by the sound waves. When tissues vibrate, this increases friction all the way down to the molecular level, causing the temperature of the targeted tissues to rise. This is a benefit of ultrasound over a traditional hot pack, which cannot penetrate into deeper musculature or joint tissues. Ultrasound heads are available in a variety of frequencies that can target a variety of depths, which gives a skilled therapist the ability to send heat exactly where she wants it to go. Some conditions that may benefit from this deeper heat, according to Belanger, include osteoarthritis and phantom limb pain.

Deeper Stretch
The deep heat generated by ultrasound can help to relax a tense or strained muscle. According to Spine Universe, this can help to minimize muscle spasms and shortening often associated with tension or injury. Spine Universe reports that ultrasound therapy has the added benefit of increasing range of motion.

Tissue Healing
Ultrasound’s deep heat is thought to have a healing effect on deep tissues. According to Belanger, ultrasound actually affects the metabolism of soft tissue cells. In addition, these cells often become more receptive to healing fluids, which are present in the increased blood flow generated by ultrasound. Because of this, Belanger goes on to report that ultrasound’s healing benefits may be useful in treating surgical wounds and soft tissue lesions.

Scar Tissue Control
Another benefit of ultrasound is its acoustic effect. The waves generated by ultrasound cause tiny vibrations in the cells of the soft tissues. These microvibrations, as Belanger describes them, have an effect on the fibers that form scar tissue. Over time, ultrasound used in this method can actually prevent some scar tissue from forming, and may be able to break some scar tissue down. Examples of success in scar tissue management are episiotomy scars as well as Dupuytren’s contracture, which is caused by excessive scarring in the tissues of the palm. As with its thermal effects, ultrasound used to break up scar tissue can also maintain and increase range of motion.

Reduced Pain
Some of the pain control from ultrasound comes from the mechanical results of the treatment itself. These include the decreased muscle spasms and muscle tightness as well as tissue healing. However, an added benefit of ultrasound comes not from what it does, but what it can help a physical therapist do. Combining the heating and healing powers of ultrasound prepares muscles for other therapeutic treatments that reduce pain, including stretching and strengthening.

Injury Prevention for the Low Back

Injury prevention is important, especially for something as essential as back health. Look at these great exercises
by Christopher McGrath for the lower back and then come visit us at San Diego Sports Physical Therapy for more great exercises! 619-756-7500

Given the prevalence of low-back pain, it is important for fitness professionals to be prepared with preventative strategies to support their clients’ low-back health. While movement deficiencies and dysfunction at any part of the body can lead to compensatory movements that may affect the low back, special consideration can be taken with regards to the core/lumbar region, as well as the functionality of the hips and thoracic spine. Strategies that are designed to stabilize and strengthen the core, while also increasing mobility through the hips and thoracic spine, can minimize excessive stresses to the low back, and enhance overall functionality and performance.

Disclaimer: Low-pack pain can be the result of many different issues (muscular strains, arthritis, herniated discs, stress, etc.). Therefore, it is important to seek appropriate diagnosis and clearance for your client before administering any type of exercise program, especially those designed to improve back health. The principles and exercise examples in this article are designed for preventative purposes—NOT as treatment of low-back pain.
A Quick Guide to Setting Priorities

When addressing strategies for low-back injury prevention, here are some basic principles to follow:

1. Core Stability vs. Core Strength

It is commonly suggested that a strong core will protect the low back. While this is true, it is not as simple as performing a series of planks and crunches. In fact, core stability and core strength can be viewed as mutually exclusive concepts. You can have good core stability without strength and visa versa. Core stability is more about timing or sequencing of the deeper core stabilizers activating at the onset of movement to provide segmental stability of the spine, while core strength is more about fitness and is typically associated with higher intensity and volume (i.e., traditional planks and crunches). Stabilization and strength complement one another; however, deficiencies in stabilization and timing can lead to inefficient strength and place an at-risk back at even greater risk, despite high levels of fitness.

For better core stability and timing, focus on exercises that promote stabilization through relatively low intensity movements. For example:

-With palms down, place fingertips under the lumbar and/or pelvis (it’s not necessary to use your whole hand).
-Assume a neutral arch in the lumbar spine and slowly lift one foot a few inches off of the floor (larger movements can disrupt the focus).
-Place the foot back on the floor and repeat with the other leg. Start by always keeping one foot on the floor.
-Primary Focus: As you perform the marching motion, maintain even weight on both hands by preventing weight shifting from hand to hand. Pay attention to left/right difference and spend extra time developing control of the side that appears weaker.

2. Reflexive Core Strength

During everyday and athletic activities, the core must respond to changing and sometimes unpredictable environments. Therefore, isometric exercises without reactive challenges can limit the core’s ability to be functional. Creating exercises that require the core to respond to shifting resistance can be a great way to teach the core how to stabilize and stay in control during dynamic movements.

Modified Plank With Alternating Knee Extension

-Assume a modified plank position. Always have at least one knee on the floor.
-Slowly extend one knee to full extension (with toes still on the floor) for two to three seconds and return to the starting position.
-Repeat with the other leg.
-Perform a series of alternating reps. Start with lower numbers to ensure control (e.g., three to five alternating reps, short rest, reset, perform again).
-Primary focus: Maintain a perfect plank while knees shift. Resisting the body’s desire to shift/rotate will improve reflexive stability and build for a stronger plank. This deceptively challenging exercise is appropriate for everyone, and serves as a great micro-progression for those that find modified planks too easy and full planks too difficult.

3. T-spine Mobility

Thoracic mobility is important, especially in regards to rotation. If the thoracic spine is restricted, the lower back will likely assume a higher percentage of rotation, leaving it vulnerable to torque related injuries. Aim for symmetrical rotation of the thoracic region.

Active Rotation

-Begin by lying on one side, with the top leg in a 90/90 position (90 degrees at hip and 90 degrees at knee); rest the top leg on an object roughly 6- to 10-inches high (foam roller, medicine ball, etc.)
-With the top hand holding the bottom set of ribs, take a deep breath and exhale while pulling upper body into rotation. Keep the top knee on the object.
-Hold for two to four seconds, return to the starting position and repeat.
-Perform with methodical movements, using slow, deep breathing to guide tempo. Complete six to 12 reps, according to how you feel. Range of motion should increase with each rep to some degree.
-Note left and right differences. If one side is tighter, spend more time on the tighter side.

4. Rotation Control

Once an acceptable range of thoracic rotation is established (or if a client already possesses appropriate or even excessive thoracic mobility), controlling the range is the next priority.

-Lie on back in a figure 4 position, with the right ankle on the left knee.
-Place the right arm on the floor even with, or slightly above, the shoulder.
-Anchor the right scapulae to the floor and do not let it pull away from the floor. This enhances scapular stability.
-Rest the left elbow on the floor and use it as an assistor if rotation cannot be controlled without the help. Otherwise, keep the elbow off of the floor.
-Slowly rotate the lower body (right heel lowering to the left), making light contact with the right foot to the floor. Return to the starting position while maintain contact with the right scapula at all times.
-Repeat on other side. Pay attention to left/right differences. Spend more time on the weaker or tighter side.

5. Hip Mobility

Ensuring adequate levels of flexibility and control through hip flexion, extension, internal and external rotation can help prevent unwanted movements of the pelvis and low back. In addition to traditional hip flexor and glute stretches, also focus on external rotators.

Hip Mobility of the External Rotators – Standing Figure 4 Hip Stretch

-Left leg instructions: Place left leg on a table approximately mid-thigh height with the femur perpendicular to the pelvis and the knee at approximately 90 degrees.
-Support the left leg with a roller, ball or towel under the knee.
-The pelvis must be parallel to the table (do not rotate the pelvis open or away from the table).
-The stretch should be felt deep in the hip (external rotators).
-Maintain a tall posture. With hands crossed over the shoulders, slowly exhale and rotate the torso to the left (towards the stretching leg); return to the starting position.
-Perform enough repetitions that hold the stretch for at least 45 seconds (six to 10 slow reps with pauses in between should be sufficient).
-Repeat on the other side. Pay attention to left/right differences, and spend more time on the tighter side as needed.

6. Hip Rotation/Integration

This exercise integrates a pressing motion with hip internal rotation and core stabilization.

-With a band or cable to the right side of the body, start with a wide, athletic stance.
-With the handle placed in front of the right chest/shoulder region and the right elbow pointing directly toward the weight/anchor, perform a single-arm press across the body.
-Keep the left leg, knee and foot pointing forward, so that the pelvis rotates over the left femur. Resist the foot turning or the leg bowing out.
-Pivoting the right foot (back foot) will result in greater rotation into the left hip.
-Return to the starting position and perform preferred number of repetitions (fitness reps/sets may apply).

One of the best strategies for remaining injury free is to not get injured in the first place. Once the injury cycle has started, however, incidence of future injury increases dramatically. Taking unnecessary risks can lead to a lifetime of recurring, frustrating issues. By prioritizing prevention strategies through proper preparatory work, sensible progression strategies, and knowing how to listen and react to warning signs (in other words, don’t “push through it”), can keep your clients exercising for a lifetime without hassle.

Chris McGrath, M.S., is the founder of Movement First, a New York City-based, health and fitness education, consulting and training organization. With more than 20 years of fitness and coaching experience, McGrath specializes in a variety of training modalities including sports performance, injury prevention, post-rehabilitation and lifestyle/wellness coaching. McGrath is a Senior Fitness Consultant to the American Council on Exercise and has established himself as an international fitness expert.

The Yoga Injury Debate

If you do yoga, do you experience any injuries? Come see us at San Diego Sports Physical Therapy to get back on track,

To yoga or not to yoga seems to be a common question for individuals. The debate is heating up in both trade and consumer publications, each explaining various relevant perceptions. The controversial topic has had the yoga community and advocates in upheaval about the negative perceptions that some have about yoga.

Although yoga has many advanced “acrobatic-like” qualities, classes offered in most health-club settings do not promote or practice advanced postures. In addition, yoga, like any other form of exercise or athletic pursuit, can pose a risk of injury. Awareness, acceptance and proper training are the keys to preventing injury.

What Causes Yoga Injury?

Injuries occur for a wide variety of reasons; in some cases, the cause may be unknown. Injuries may occur on the point of action, while other ailments creep up over time, with no explainable cause as to why the pain or injury occurred.

Some individuals argue that specific yoga poses cause injury due to a joint’s vulnerability in the pose, while others believe advanced postures are the primary cause of injuries.

While there is no single cause of yoga injuries, here are some common reasons why they often occur:

-Pushing beyond one’s physical capabilities to more advanced postures
-Forcing the body to stretch beyond one’s flexibility level
-Not being mentally prepared, or stable, for advanced postures
-Striving for perfection in poses

The Flexibility Spectrum

The occasional yoga participant potentially faces the greatest risk of injury due to a restricted range of motion in the joints. When there is a lack of mobility, other joints may try to compensate, which may result in overstraining, overuse or injury.

On the other hand, many yoga instructors may have experienced injuries due to having a highly flexible body. Having muscles that are too lax or flexible may make the individual more likely to overstretch the ligaments and tendons.

Ideally, one should be located near the center of the flexibility.

Personal Flexibility Awareness

Every body is gifted with a natural ability. Just as athletes are “born” with genetic gifts that, along with considerable training, enable them to excel in their sports, some individuals are naturally more flexible than others. In addition, some individuals who have practiced yoga, gymnastics or dancing from a young age are flexible and strong enough to perform advanced postures in their adult years.

Individuals who start a yoga practice after the age of 30 may or may not progress to advanced postures. It can sometimes take years to get the mind and/or body in an advanced state. Progressing yoga poses is similar to progressing traditional exercises, requiring one to build a solid foundation before moving toward the advanced state.

Wanting to look and perform like others in class, however, can increase the risk of moving beyond one’s current flexibility.

Acceptance of One’s Ability

Mass marketing yoga advertisements show yogis effortlessly performing beautiful postures. This makes us strive to or become curious about how to perform these poses. Generally, this is the point where we force ourselves to move, bend or stretch beyond our capability.

In yoga, this is called the ego—the driving force that wants to shine and succeed, or the voice that tells us we are not good or strong enough. Yoga instructors and attendees need to step off their mat and analyze their abilities and embrace their strengths. Acceptance is what keeps us satisfied in our practice and trusting ourselves on when to progress a given posture.

For example, a person may have a lack in spinal extension, which can make back-bending postures challenging, especially advanced spinal extension movements. However, this person may have exceptional wrist and forearm strength to perform beautiful inversions. This does not mean she has to avoid backbends; rather, she must understand and accept her limits and capabilities without forcing the spine into a foreign position.

What Comes First—the Fear or the Posture?

When progressing to advanced postures, many yoga instructors promote overcoming physical fear through advanced postures. For example, if someone has had wrist issues and a fear of re-injuring that joint or a fear of falling, one can perform a handstand (with or without wall support) to overcome the fear. Although this notion is successful for some, it poses another question of whether or not an advanced posture should be the driving force to overcome fear.

In yoga, as in many other sports, one must truly train the mind and be confident in one’s ability before progressing to advanced states. A baseball pitcher or tennis player must be mentally sound and visualize that perfect pitch or serve. If an athlete doubts his or her abilities, the majority of the time that pitch or serve will be unsuccessful or erratic. The same concept applies in yoga.

When performing a handstand, if one thinks, “I can’t do this. I don’t want to fall. I’m scared,” he or she is not mentally prepared yet. When the mind flutters, the physical body may weaken or fall, which can result in strain or injury.

Final Thoughts

Though some individuals have been seriously injured in yoga, it is best for practitioners to instruct various levels of yoga poses when working with the general population. Many yoga poses are not appropriate for everyone and instructors should understand which higher-risk asanas should be modified.

Neither the student nor the instructor should fear yoga. Education and awareness are essential for those who want to perform to perfection or advanced postures. Many students have that driving force to push forward, but it is through clear communication that we can educate them about the potential risks.

With various body types and mixed-level classes, the requirements are higher for instructors to know the anatomy and potential risks of each pose. When in doubt, teach the basic and common poses, such as Warriors, downward facing dog and balance poses.

References

American Academy of Orthopaedic Surgeons (AAOS) (2012). Yoga Injury Prevention.

Kerr, Z. et al. (2010). Epidemiology of weight training-related injuries presenting to United States emergency departments, 1990 to 2007.The American Journal of Sports Medicine, 38, 765- 771.