Falls in Senior Population: Can We Prevent Them?

30% of people over the age of 65 years fall 1 or more times in a year. Falls are the leading cause of death from injury in elderly adults. In 2003, 13,700 people died from falls. A fall is defined as an event that results in a person coming to rest unintentionally on the ground or on a lower level but not caused by an internal trauma (e.g. stroke). Intrinsic risk factors include: Medical Condition, Cognition, Psychosocial, Sensory, Central Processing, and Musculoskeletal.

Medical risk factors include: Co-morbidities (Pulmonary Disease, MS, Prolonged bed rest, Stroke, Diabetes) and Polypharmacy (overmedicated). It has been documented that 4 or more prescribed medications significantly increases risk for falls. Meds used to treat hypertension, heart disease, and depression may cause dizziness. Cognition which includes safety awareness, attention, and judgment combined with Psychosocial (depression, anxiety) attributes can also greatly affect fall risk. Central Processing concerns area of: limits of stability, reaction time, anticipatory reactions, and postural Stability.  Sensory Loss is quite evident in a majority of falls and will encompass losses in one or all of the following: Vision, Vestibular, and Somatosensory (impaired position sense). Musculoskeletal deficits include: Losses in Strength, flexibility, endurance, and postural alignment; Gait (decreased step length, increased step frequency, decreased speed, and increased lateral sway); and Coordination (ability to change directions).

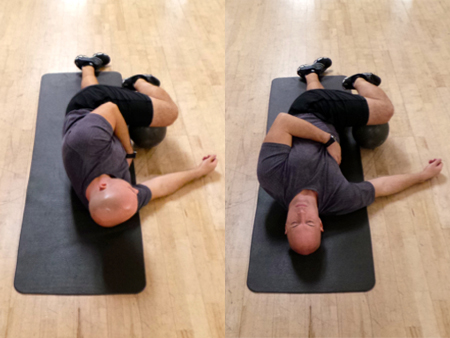
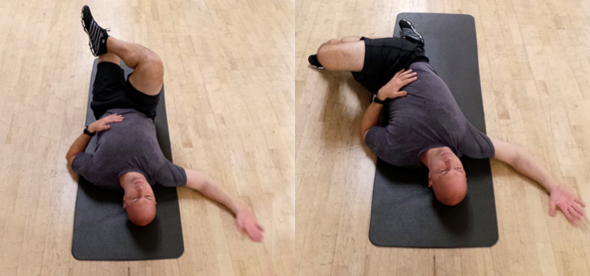
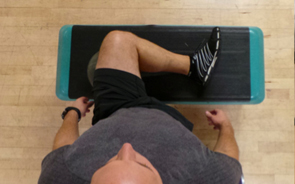
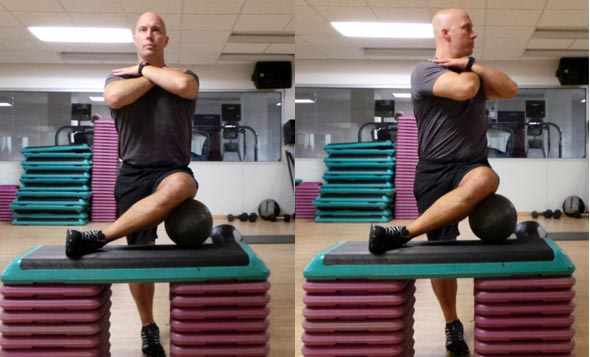
Extrinsic factors include: Environment, Social, History of Falls, and Activity level. History of falls is especially relevant if history of: 1 or more falls in a year, falling indoors, or an inability to get up after fall. Exercises to Prevent Falls include: Tai Chi, Individualized multidimensional exercise program and Exercise in physical therapy sessions with appropriate home exercises will decrease risk for falls and improve Mobility Assessment scores. Loss of balance and falls could be prevented with seniors if adults take measures to protect themselves, much as they do against health conditions such as heart disease. An assessment and treatment by a Licensed Physical Therapist is the obvious choice in obtaining this protection. Loss of balance and limitations in mobility can be effectively prevented, reversed, or delayed by physical therapy treatments. A comprehensive balance assessment performed by a physical therapist can determine the factors as above that are contributing to an individual’s fall risk. A physical therapist plan of care will include exercises to improve strength, aerobic capacity, flexibility, proper gait, and the function of the vestibular system. Balance training and fear management will also be addressed.


For more information on the physical therapist’s role in preventing falls contact:

Greg Sterner, Board Certified Orthopedic Clinical Specialist in Physical Therapy, Owner

San Diego Sports Physical Therapy

2750 Dewey Rd. Ste 101

San Diego, CA 92106

Physical Therapist’s Guide to Rotator Cuff Tear

Take care of your shoulders, and learn more about rotator cuff tears in this article from the American Physical Therapy Association, written by by Charles Thigpen, PhD, PT, ATC and Lane Bailey, PT, DPT, CSCS. For more questions, call our studio at 619-756-7500!


The “rotator cuff” is a group of 4 muscles that are responsible for keeping the shoulder joint stable. Unfortunately, injuries to the rotator cuff are very common, either from injury or with repeated overuse of the shoulder. Injuries to the rotator cuff can vary as a person ages. Rotator cuff tears are more common later in life, but they also can occur in younger people. Athletes and heavy laborers are commonly affected; older adults also can injure the rotator cuff when they fall or strain the shoulder, such as when walking a dog that pulls on the leash. When left untreated, this injury can cause severe pain and a decrease in the ability to use the arm.


What is a Rotator Cuff Tear?

The “rotator cuff” is a group of 4 muscles and their tendons (which attach them to the bone). These muscles connect the upper-arm bone, or humerus, to the shoulder blade. The important job of the rotator cuff is to keep the shoulder joint stable. Sometimes, the rotator cuff becomes inflamed or irritated due to heavy lifting, repetitive arm movements, or a fall. A rotator cuff tear occurs when injuries to the muscles or tendons cause tissue damage or disruption.

Rotator cuff tears are called either “full-thickness” or partial-thickness,” depending on how severe they are. Full-thickness tears extend from the top to the bottom of a rotator cuff muscle/tendon. Partial-thickness tears affect at least some portion of a rotator cuff muscle/tendon, but do not extend all the way through.

Tears often develop as a result of either a traumatic event or long-term overuse of the shoulder. These conditions are commonly called acute or chronic:

  • An acute rotator cuff tear is one that just recently occurred, often due to a trauma such as a fall or lifting a heavy object.
  • Chronic rotator cuff tears are much slower to develop. These tears are often the result of repeated actions with the arms working above shoulder level—such as with ball-throwing sports or certain work activities.

People with chronic rotator cuff injuries often have a history of rotator cuff tendon irritation that causes shoulder pain with movement. This condition is known as shoulder impingement syndrome (SIS).

Rotator cuff tears also may occur in combination with injuries or irritation of the biceps tendon at the shoulder, or with labral tears (to the ring of cartilage at the shoulder joint).

Rotator Cuff Tear-SmallRotator Cuff Tear: See More Detail

How Does it Feel?

Rotator cuff tears can cause:

  • Pain over the top of the shoulder or down the outside of the arm
  • Shoulder weakness
  • Loss of shoulder motion

The injured arm often feels heavy, weak, and painful. In severe cases, tears may keep you from doing your daily activities or even raising your arm. People with rotator cuff tears often are unable to lift the arm to reach high shelves or reach behind their backs to tuck in a shirt or blouse, pull out a wallet, or fasten a bra.


How Is It Diagnosed?

Your physical therapist will review your health history, perform a thorough examination, and conduct a series of tests designed specifically to help pinpoint the cause of your shoulder pain.

Physical therapists perform specialized tests–such as the Hawkins-Kennedy impingement test, Neer’s impingement sign, and the external rotation lag sign– to diagnose an impingement or a tear. For instance, your therapist may raise your arm, move your arm out to the side, or raise your arm and ask you to resist a force, all at specific angles of elevation. These tests may cause you to feel some temporary discomfort, but don’t worry—that’s normal and part of what helps the therapist identify the exact source of your problem.

In some cases, the results of these tests might indicate the need for a referral to an orthopedist or for imaging tests, such as ultrasound imaging, magnetic resonance imaging (MRI), or computed tomography (CT).


How Can a Physical Therapist Help?

Once a rotator cuff injury has been diagnosed, you will work with your orthopedist and physical therapist to decide if you should have surgery or if you can try to manage your recovery without surgery. If you don’t have surgery, your therapist will work with you to restore your range of motion, muscle strength, and coordination, so that you can return to your regular activities. In some cases, your therapist may help you learn to modify your physical activity so that you put less stress on your shoulder. If you decide to have surgery, your therapist can help you both before and after the procedure.

Regardless of which treatment you have—physical therapy only, or surgery and physical therapy—early treatment can help speed up healing and avoid permanent damage.


If You Have an Acute Injury

If a rotator cuff tear is suspected following a trauma, seek the attention of a physical therapist or other health care provider to rule out the possibility of serious life- or limb-threatening conditions. Once serious injury is ruled out, your physical therapist will help you manage your pain and will prepare you for the best course of treatment.


If You Have a Chronic Injury

A physical therapist can help manage the symptoms of chronic rotator cuff tears as well as improve how your shoulder works. For large rotator cuff tears that can’t be fully repaired, physical therapists can teach special strategies to improve shoulder movement.


If You Have Surgery

Once a full-thickness rotator cuff tear develops, you may need surgery to restore use of the shoulder or decrease painful symptoms. Physical therapy is an important part of the recovery process. The repaired rotator cuff is vulnerable to reinjury following shoulder surgery, so it’s important to work with a physical therapist to safely regain full use of the injured arm. After the surgical repair, you will need to wear a sling to keep your shoulder and arm protected as the repair heals. Once you are able to remove the sling for exercise, the physical therapist will begin your exercise program.

Your physical therapist will design a treatment program based on both the findings of the evaluation and your personal goals. He or she will guide you through your postsurgical rehabilitation, which will progress from gentle range-of-motion and strengthening exercises and ultimately to activity- or sport-specific exercises. Your treatment program most likely will include a combination of exercises to strengthen the rotator cuff and other muscles that support the shoulder joint. Your therapist will instruct you in how to use therapeutic resistance bands. The timeline for your recovery will vary depending on the surgical procedure and your general state of health, but full return to sports, heavy lifting, and other strenuous activities might not begin until 4 months after surgery. Your shoulder will be very susceptible to reinjury, so it is extremely important to follow the postoperative instructions provided by your surgeon and physical therapist.

Physical therapy after your shoulder surgery is essential to restore your shoulder’s function. Your rehabilitation will typically be divided into 4 phases:

  • Phase I (maximal protection). This phase lasts for the first few weeks after your surgery, when your shoulder is at the greatest risk of reinjury. During this phase, your arm will be in a sling. You will likely need assistance or need strategies to accomplish everyday tasks such as bathing and dressing. Your physical therapist will teach you gentle range-of-motion and isometric strengthening exercises, will provide hands-on techniques such as gentle massage, will offer advice on reducing your pain, and may use cold compression and electrical stimulation to relieve pain.
  • Phase II (moderate protection). This next phase has the goal of restoring mobility to the shoulder. You will reduce the use of your sling, and your range-of-motion and strengthening exercises will become more challenging. Exercises will be added to strengthen the “core” muscles of your trunk and shoulder blade (scapula) and “rotator cuff” muscles that provide additional support and stability to your shoulder. You will be able to begin using your arm for daily activities, but will still avoid any heavy lifting with your arm. Your physical therapist may use special hands-on mobilization techniques during this phase to help restore your shoulder’s range of motion.
  • Phase III (return to activity). This phase has the goal of restoring your strength and joint awareness to equal that of your other shoulder. At this point, you should have full use of your arm for daily activities, but you will still be unable to participate in activities such as sports, yard work, or physically strenuous work-related tasks. Your physical therapist will advance the difficulty of your exercises by adding more weight or by having you use more challenging movement patterns. A modified weight-lifting/gym-based program may also be started during this phase.
  • Phase IV (return to occupation/sport). This phase will help you return to sports, work, and other higher-level activities. During this phase, your physical therapist will instruct you in activity-specific exercises to meet your needs. For certain athletes, this may include throwing and catching drills. For others, it may include practice in lifting heavier items onto shelves, or instruction in raking, shoveling, or housework.


Can this Injury or Condition be Prevented?

A physical therapist can help you decrease your risk of developing or worsening a rotator cuff tear, especially if you seek assistance at the first sign of shoulder pain or discomfort. To avoid developing or progressing to a rotator cuff tear from an existing shoulder impingement, it is imperative to avoid future exacerbations. Your physical therapist can help you strengthen your rotator cuff muscles, train you to avoid potentially harmful positions, and determine when it is appropriate for you to return to your normal activities.

General Tips:

  • Avoid repeated overhead arm positions that may cause shoulder pain. If your job requires such movements, seek out the advice of a physical therapist to learn arm positions that may be used with less risk.
  • Apply rotator cuff muscle and scapular strengthening exercises into your normal exercise routine. The strength of the rotator cuff is just as important as the strength of any other muscle group. To avoid potential detriment to the rotator cuff, general strengthening and fitness programs may improve shoulder health.
  • Practice good posture. A forward position of the head and shoulders has been shown to alter shoulder blade position and create shoulder impingement syndrome.
  • Avoid sleeping on your side with your arm stretched overhead, or lying on your shoulder. These positions can begin the process that causes rotator cuff damage.
  • Avoid carrying heavy objects at your side; this can strain the rotator cuff.
  • Avoid smoking; it can decrease the blood flow to your rotator cuff.
  • Consult a physical therapist at the first sign of symptoms.


Real Life Experiences

Over the past 3 weeks, Jonathan has felt pain in his shoulder while repainting his house. Now, every time he raises his arm overhead, it hurts. He notices that the pain has been steadily getting worse.

What should he do?

  • Rest. Avoid activities that require reaching overhead and rest his elbow on an armrest when sitting. This may allow the irritated muscles and tendons to heal.
  • Ice. Apply ice to the shoulder to help decrease any irritation and swelling.

Jonathan has stopped reaching overhead to paint and puts ice on his shoulder in the evening. But he still feels pain and stiffness in the area, and he can’t move his arm without pain or weakness. He contacts his physical therapist, who prescribes exercises to strengthen his rotator cuff muscles and improve postural habits, and provides education to avoid exacerbating activities.

This story was based on a real-life case. Your case may be different. Your physical therapist will tailor a treatment program to your specific case.

What Kind of Physical Therapist Do I Need?

All physical therapists are prepared through education and experience to treat patients who have a rotator cuff tear, but you may want to consider:

  • A physical therapist who is experienced in treating people with musculoskeletal problems. Some physical therapists have a practice with an orthopedic focus.
  • A physical therapist who is a board-certified clinical specialist or who completed a residency or fellowship in orthopedics physical therapy has advanced knowledge, experience, and skills that may apply to your condition.

You can find physical therapists who have these and other credentials by using Find a PT, the online tool built by the American Physical Therapy Association to help you search for physical therapists with specific clinical expertise in your geographic area.

General tips when you’re looking for a physical therapist (or any other health care provider):

  • Get recommendations from family and friends or from other health care providers.
  • When you contact a physical therapy clinic for an appointment, ask about the physical therapists’ experience in helping people with labral tears.
  • During your first visit with the physical therapist, be prepared to describe your symptoms in as much detail as possible, and say what makes your symptoms worse.

Injury Prevention for the Low Back

Injury prevention is important, especially for something as essential as back health. Look at these great exercises
by Christopher McGrath for the lower back and then come visit us at San Diego Sports Physical Therapy for more great exercises! 619-756-7500

Given the prevalence of low-back pain, it is important for fitness professionals to be prepared with preventative strategies to support their clients’ low-back health. While movement deficiencies and dysfunction at any part of the body can lead to compensatory movements that may affect the low back, special consideration can be taken with regards to the core/lumbar region, as well as the functionality of the hips and thoracic spine. Strategies that are designed to stabilize and strengthen the core, while also increasing mobility through the hips and thoracic spine, can minimize excessive stresses to the low back, and enhance overall functionality and performance.

Disclaimer: Low-pack pain can be the result of many different issues (muscular strains, arthritis, herniated discs, stress, etc.). Therefore, it is important to seek appropriate diagnosis and clearance for your client before administering any type of exercise program, especially those designed to improve back health. The principles and exercise examples in this article are designed for preventative purposes—NOT as treatment of low-back pain.
A Quick Guide to Setting Priorities

When addressing strategies for low-back injury prevention, here are some basic principles to follow:

1. Core Stability vs. Core Strength

It is commonly suggested that a strong core will protect the low back. While this is true, it is not as simple as performing a series of planks and crunches. In fact, core stability and core strength can be viewed as mutually exclusive concepts. You can have good core stability without strength and visa versa. Core stability is more about timing or sequencing of the deeper core stabilizers activating at the onset of movement to provide segmental stability of the spine, while core strength is more about fitness and is typically associated with higher intensity and volume (i.e., traditional planks and crunches). Stabilization and strength complement one another; however, deficiencies in stabilization and timing can lead to inefficient strength and place an at-risk back at even greater risk, despite high levels of fitness.

For better core stability and timing, focus on exercises that promote stabilization through relatively low intensity movements. For example:

-With palms down, place fingertips under the lumbar and/or pelvis (it’s not necessary to use your whole hand).
-Assume a neutral arch in the lumbar spine and slowly lift one foot a few inches off of the floor (larger movements can disrupt the focus).
-Place the foot back on the floor and repeat with the other leg. Start by always keeping one foot on the floor.
-Primary Focus: As you perform the marching motion, maintain even weight on both hands by preventing weight shifting from hand to hand. Pay attention to left/right difference and spend extra time developing control of the side that appears weaker.

2. Reflexive Core Strength

During everyday and athletic activities, the core must respond to changing and sometimes unpredictable environments. Therefore, isometric exercises without reactive challenges can limit the core’s ability to be functional. Creating exercises that require the core to respond to shifting resistance can be a great way to teach the core how to stabilize and stay in control during dynamic movements.

Modified Plank With Alternating Knee Extension

-Assume a modified plank position. Always have at least one knee on the floor.
-Slowly extend one knee to full extension (with toes still on the floor) for two to three seconds and return to the starting position.
-Repeat with the other leg.
-Perform a series of alternating reps. Start with lower numbers to ensure control (e.g., three to five alternating reps, short rest, reset, perform again).
-Primary focus: Maintain a perfect plank while knees shift. Resisting the body’s desire to shift/rotate will improve reflexive stability and build for a stronger plank. This deceptively challenging exercise is appropriate for everyone, and serves as a great micro-progression for those that find modified planks too easy and full planks too difficult.

3. T-spine Mobility

Thoracic mobility is important, especially in regards to rotation. If the thoracic spine is restricted, the lower back will likely assume a higher percentage of rotation, leaving it vulnerable to torque related injuries. Aim for symmetrical rotation of the thoracic region.

Active Rotation

-Begin by lying on one side, with the top leg in a 90/90 position (90 degrees at hip and 90 degrees at knee); rest the top leg on an object roughly 6- to 10-inches high (foam roller, medicine ball, etc.)
-With the top hand holding the bottom set of ribs, take a deep breath and exhale while pulling upper body into rotation. Keep the top knee on the object.
-Hold for two to four seconds, return to the starting position and repeat.
-Perform with methodical movements, using slow, deep breathing to guide tempo. Complete six to 12 reps, according to how you feel. Range of motion should increase with each rep to some degree.
-Note left and right differences. If one side is tighter, spend more time on the tighter side.

4. Rotation Control

Once an acceptable range of thoracic rotation is established (or if a client already possesses appropriate or even excessive thoracic mobility), controlling the range is the next priority.

-Lie on back in a figure 4 position, with the right ankle on the left knee.
-Place the right arm on the floor even with, or slightly above, the shoulder.
-Anchor the right scapulae to the floor and do not let it pull away from the floor. This enhances scapular stability.
-Rest the left elbow on the floor and use it as an assistor if rotation cannot be controlled without the help. Otherwise, keep the elbow off of the floor.
-Slowly rotate the lower body (right heel lowering to the left), making light contact with the right foot to the floor. Return to the starting position while maintain contact with the right scapula at all times.
-Repeat on other side. Pay attention to left/right differences. Spend more time on the weaker or tighter side.

5. Hip Mobility

Ensuring adequate levels of flexibility and control through hip flexion, extension, internal and external rotation can help prevent unwanted movements of the pelvis and low back. In addition to traditional hip flexor and glute stretches, also focus on external rotators.

Hip Mobility of the External Rotators – Standing Figure 4 Hip Stretch

-Left leg instructions: Place left leg on a table approximately mid-thigh height with the femur perpendicular to the pelvis and the knee at approximately 90 degrees.
-Support the left leg with a roller, ball or towel under the knee.
-The pelvis must be parallel to the table (do not rotate the pelvis open or away from the table).
-The stretch should be felt deep in the hip (external rotators).
-Maintain a tall posture. With hands crossed over the shoulders, slowly exhale and rotate the torso to the left (towards the stretching leg); return to the starting position.
-Perform enough repetitions that hold the stretch for at least 45 seconds (six to 10 slow reps with pauses in between should be sufficient).
-Repeat on the other side. Pay attention to left/right differences, and spend more time on the tighter side as needed.

6. Hip Rotation/Integration

This exercise integrates a pressing motion with hip internal rotation and core stabilization.

-With a band or cable to the right side of the body, start with a wide, athletic stance.
-With the handle placed in front of the right chest/shoulder region and the right elbow pointing directly toward the weight/anchor, perform a single-arm press across the body.
-Keep the left leg, knee and foot pointing forward, so that the pelvis rotates over the left femur. Resist the foot turning or the leg bowing out.
-Pivoting the right foot (back foot) will result in greater rotation into the left hip.
-Return to the starting position and perform preferred number of repetitions (fitness reps/sets may apply).

One of the best strategies for remaining injury free is to not get injured in the first place. Once the injury cycle has started, however, incidence of future injury increases dramatically. Taking unnecessary risks can lead to a lifetime of recurring, frustrating issues. By prioritizing prevention strategies through proper preparatory work, sensible progression strategies, and knowing how to listen and react to warning signs (in other words, don’t “push through it”), can keep your clients exercising for a lifetime without hassle.

Chris McGrath, M.S., is the founder of Movement First, a New York City-based, health and fitness education, consulting and training organization. With more than 20 years of fitness and coaching experience, McGrath specializes in a variety of training modalities including sports performance, injury prevention, post-rehabilitation and lifestyle/wellness coaching. McGrath is a Senior Fitness Consultant to the American Council on Exercise and has established himself as an international fitness expert.